# 4.TravisCI
# 使用简介
Travis CI 只支持 Github,不支持其他代码托管服务。这意味着,你必须满足以下条件,才能使用 Travis CI。
- 拥有 GitHub 帐号
- 该帐号下面有一个项目
- 该项目里面有可运行的代码
- 该项目还包含构建或测试脚本
Travis简单的使用步骤:
- github授权及面板
- 获取github的Tokens
- 配置项目.travis.yml
- Node项目
- Script脚本
- 部署到github pages
- 钩子用法
- 其他
github授权及面板
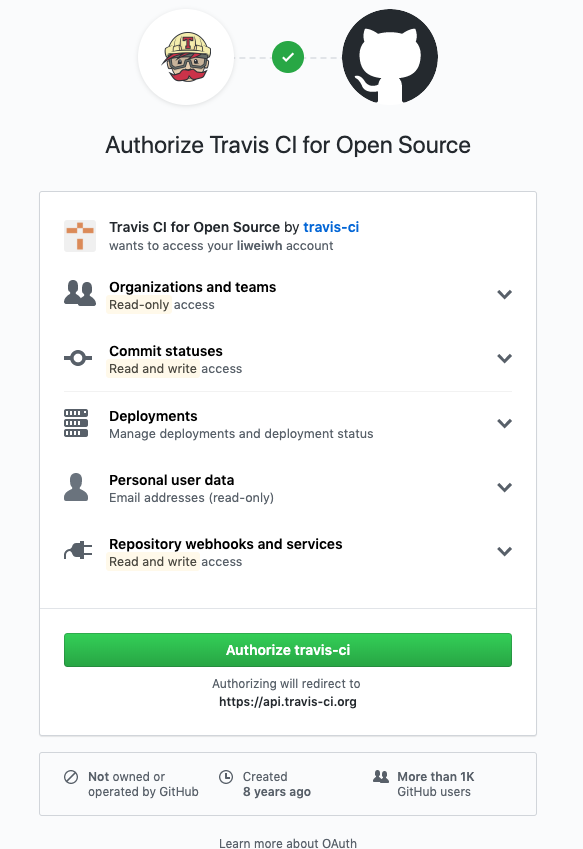
首先,访问官方网站 travis-ci.org (opens new window),点击右上角的个人头像,使用 Github 账户登入 Travis CI。
会进入到授权页面,这里跟微博、QQ是一回事,主要是读取你的用户信息。
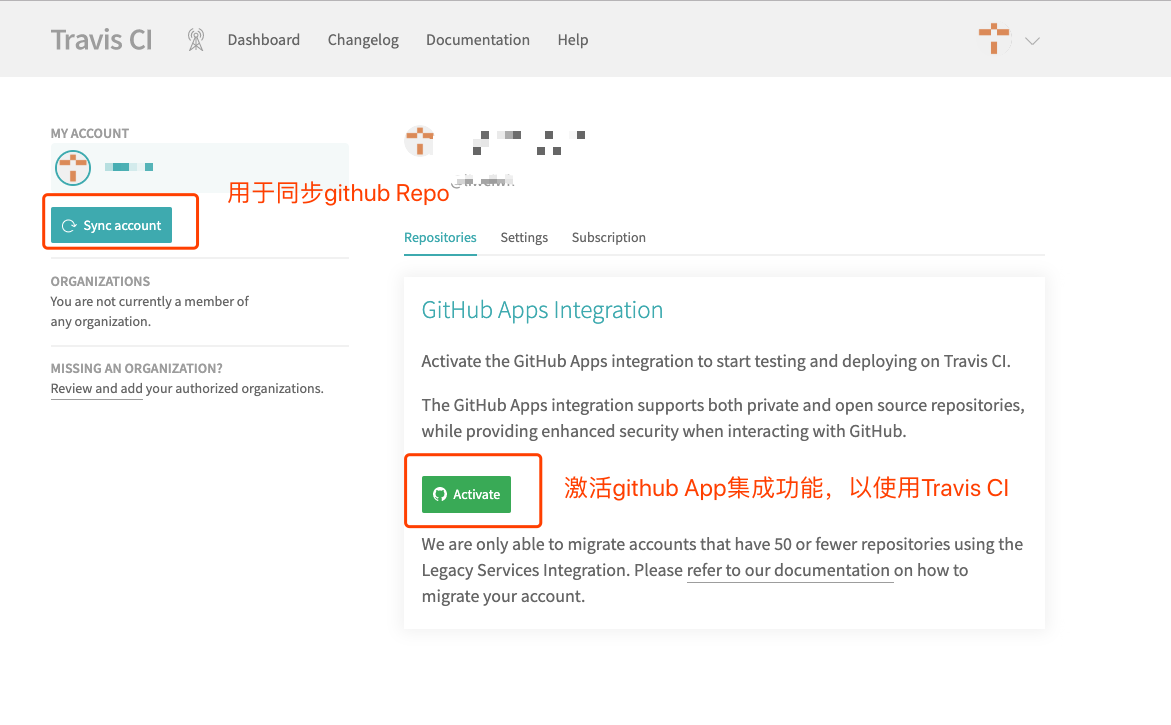
这里第二步在,Dashboard这个选项卡中,点击Activate这个按钮
完了之后,Dashboard会列出所有Github中有.travis.yml配置文件的仓库:
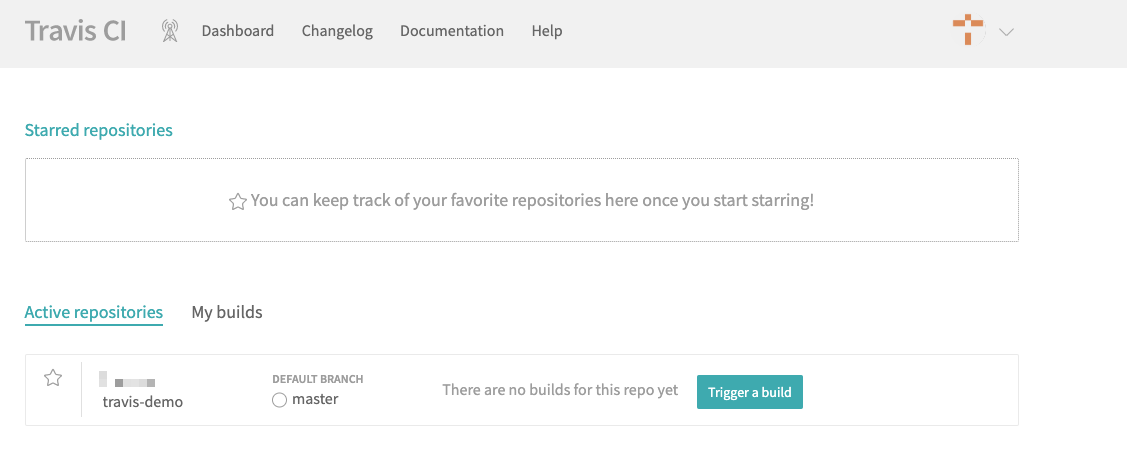
Travis 会列出 Github 上面你的所有仓库,以及你所属于的组织。此时,选择你需要 Travis 帮你构建的仓库,打开仓库旁边的开关。一旦激活了一个仓库,Travis 会监听这个仓库的所有变化。
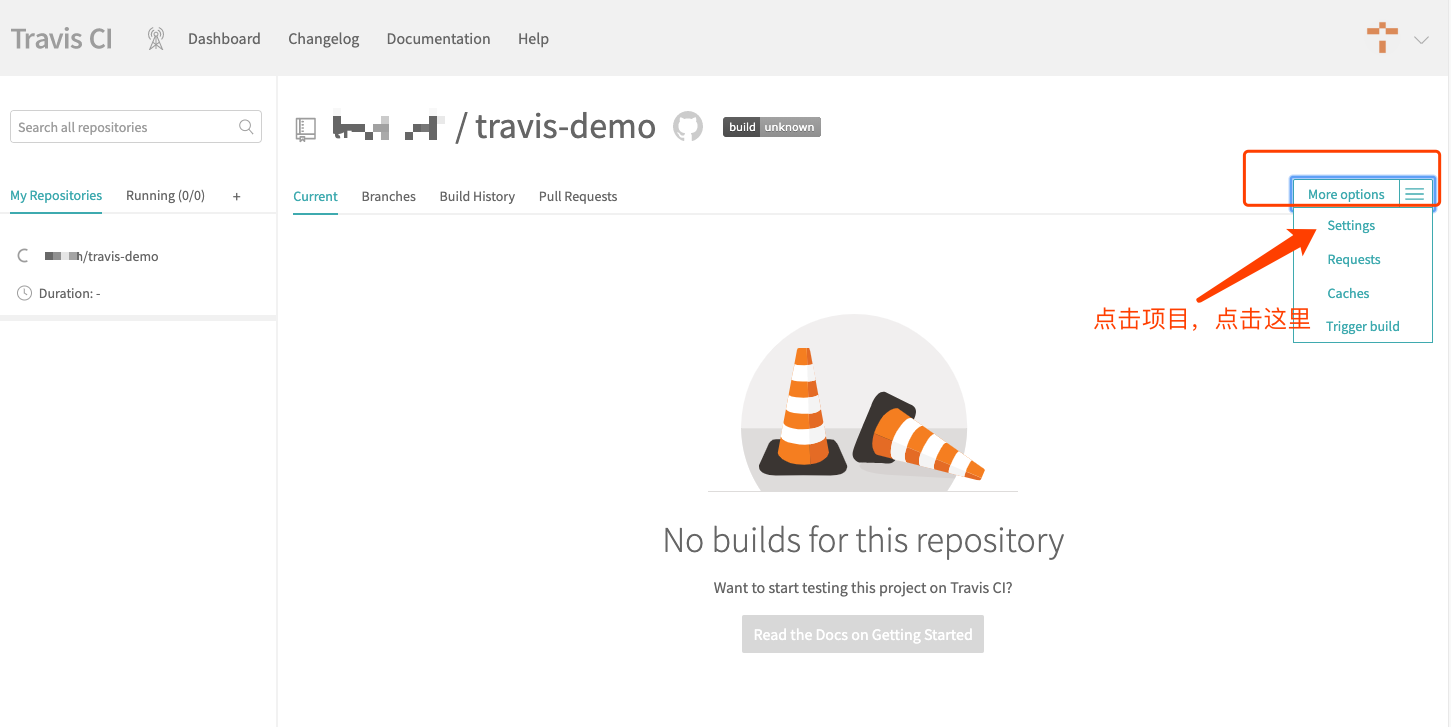
Settings中用于配置项目的构建条件
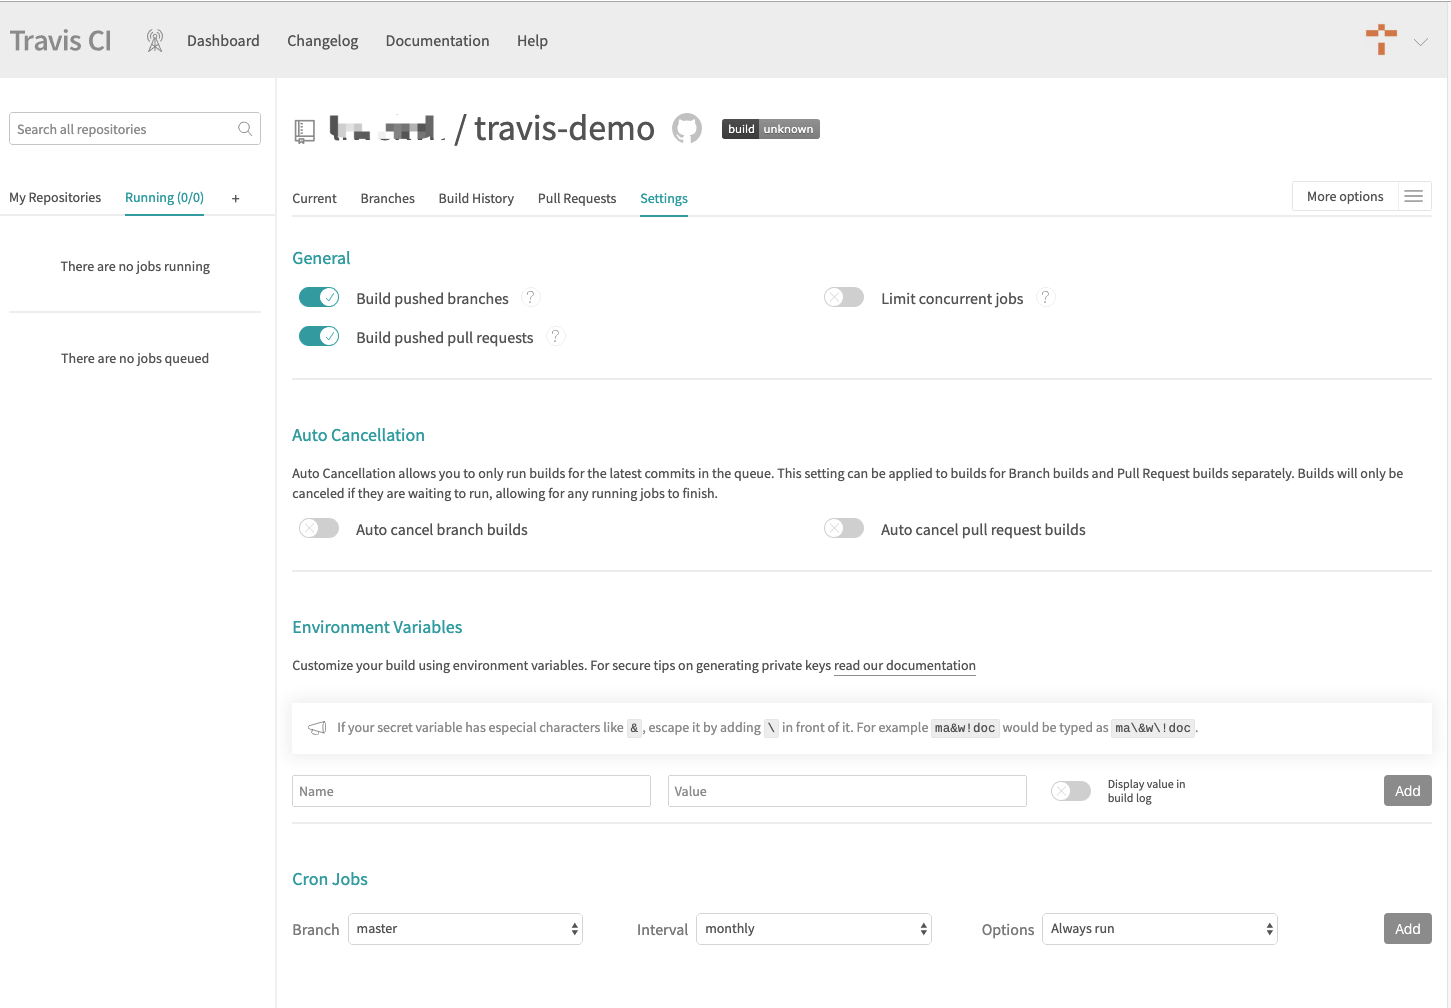
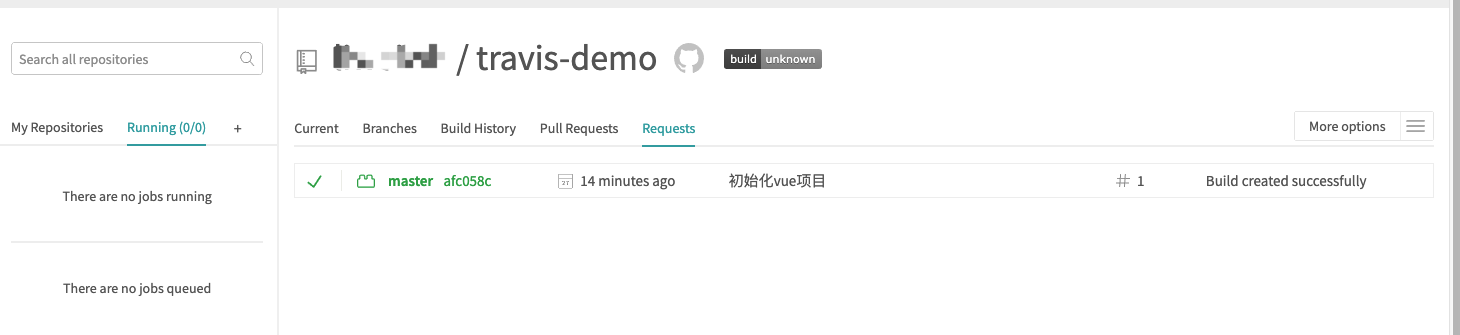
Requests可以查看构建记录
Caches主要是缓存文件Trigger build手动触发构建
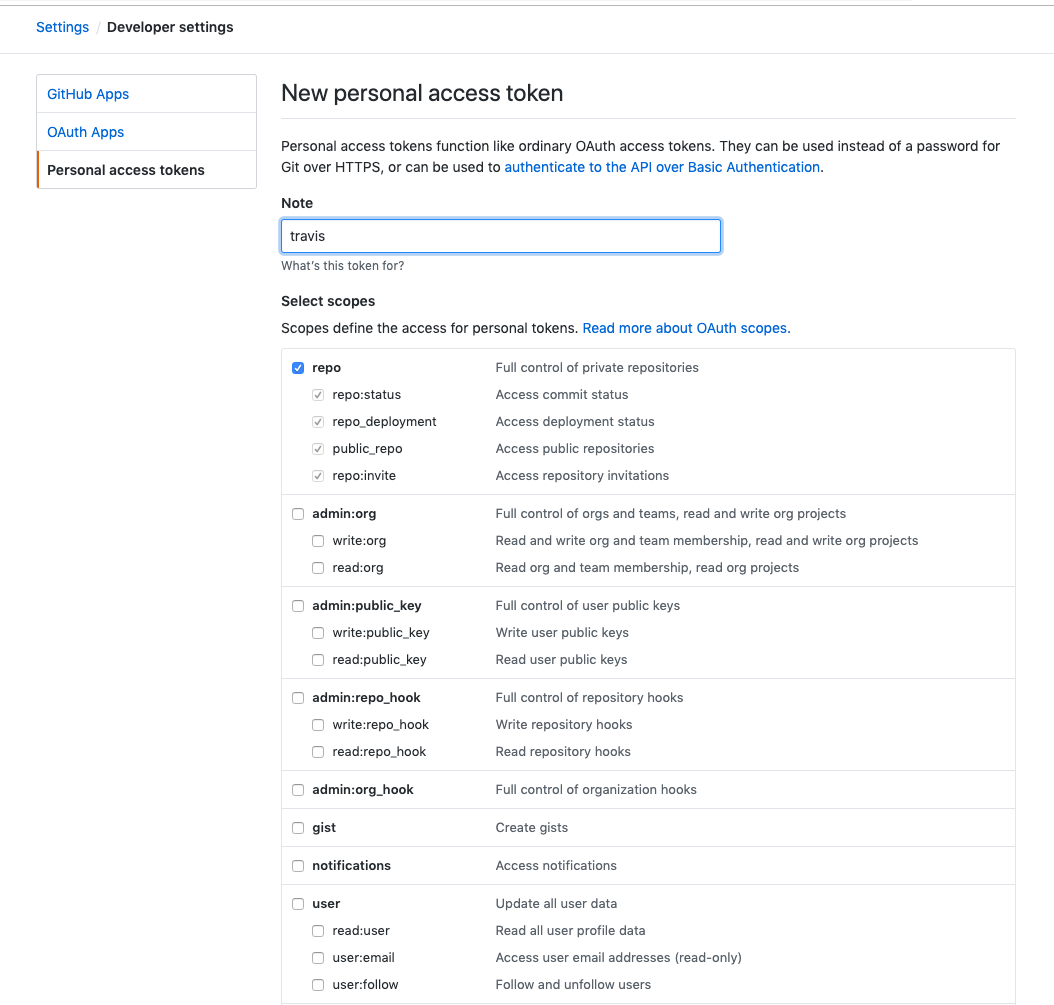
获取github的token
在settings->Developer settings->Personal access tokens->Generate new token
配置项目的.travis.yml文件
设置项目语言
language: node_js
node_js:
  - "10"
1
2
3Script脚本
Travis 的运行流程很简单,任何项目都会经过两个阶段。
- install 阶段:安装依赖
- script 阶段:运行脚本
配置文件:
# S: Build Lifecycle
install:
  - yarn install

// 钩子方法
before_script:

# 无其他依赖项所以执行npm run build 构建就行了
script:
  - npm run build
1
2
3
4
5
6
7
8
9
10如果不需要安装,即跳过安装阶段,就直接设为
true。install: true1script字段用来指定构建或测试脚本。script: bundle exec thor build1如果有多个脚本,可以写成下面的形式。
script:
  - command1
  - command2
1
2
3部署到github pages
deploy:
	# 其他的一些配置项,可以参考:https://docs.travis-ci.com/user/deployment/pages/
  provider: pages
  skip_cleanup: true
  local_dir: dist/
  github_token: $GITHUB_TOKEN # Set in the settings page of your repository, as a secure variable
  keep_history: false
  on:
    branch: master
1
2
3
4
5
6
7
8
9钩子用法
Travis 为上面这些阶段提供了7个钩子。
- before_install:install 阶段之前执行
- before_script:script 阶段之前执行
- after_failure:script 阶段失败时执行
- after_success:script 阶段成功时执行
- before_deploy:deploy 步骤之前执行
- after_deploy:deploy 步骤之后执行
- after_script:script 阶段之后执行
完整的生命周期,从开始到结束是下面的流程。
- before_install
- install
- before_script
- script
- aftersuccess or afterfailure
- [OPTIONAL] before_deploy
- [OPTIONAL] deploy
- [OPTIONAL] after_deploy
- after_script
参考资料:
- Auto-deploying built products to gh-pages with Travis (opens new window)
- SSH deploys with Travis CI (opens new window)
- 持续集成服务 Travis CI 教程 (opens new window)
# 配置Node.js应用
配置一个Vue实例并发布到github pages
.travis.yml文件:
language: node_js
node_js:
  - "10"

# Travis-CI Caching
cache:
  directories:
    - node_modules

# S: Build Lifecycle
install:
  - yarn install

before_script:

# 无其他依赖项所以执行npm run build 构建就行了
script:
  - npm run build

deploy:
	# 其他的一些配置项,可以参考:https://docs.travis-ci.com/user/deployment/pages/
  provider: pages
  skip_cleanup: true
  local_dir: dist/
  github_token: $GITHUB_TOKEN # Set in the settings page of your repository, as a secure variable
  keep_history: false
  on:
    branch: master
2
3
4
5
6
7
8
9
10
11
12
13
14
15
16
17
18
19
20
21
22
23
24
25
26
27
28
← 3.Jenkins 5.CircleCI →